|
Use the Import Wizard |
Scroll Previous Topic Top Next Topic More |
The Import Wizard supports you to load an event log in csv-format or in XES-format to the MPM ProcessMining Template App. You do not need to write Qlik Script anymore to fill the MPM Template App with your event log. The wizard will copy the selected MPM ProcessMining Template App and fill it with the uploaded event data. The newly created app appears in your Qlik Hub workspace, where you can start working with it.
|
Regarding the possibility of uploading a XES-file - the MEHRWERK GmbH got the XES certification by the IEEE Task Force in early 2021 for the product MEHRWERK ProcessMining (MPM). |

To get to the Import Wizard use one of these links, depending on the installation:
•https://<yourQlikSenseEnvironment>/resources/importwizard/index.html or http://<yourQlikSenseEnvironment>/resources/importwizard/index.html
•https://<yourQlikSenseEnvironment>/content/importwizard/index.html or http://<yourQlikSenseEnvironment>/content/importwizard/index.html
In order to use the Import Wizard, perform the following steps:
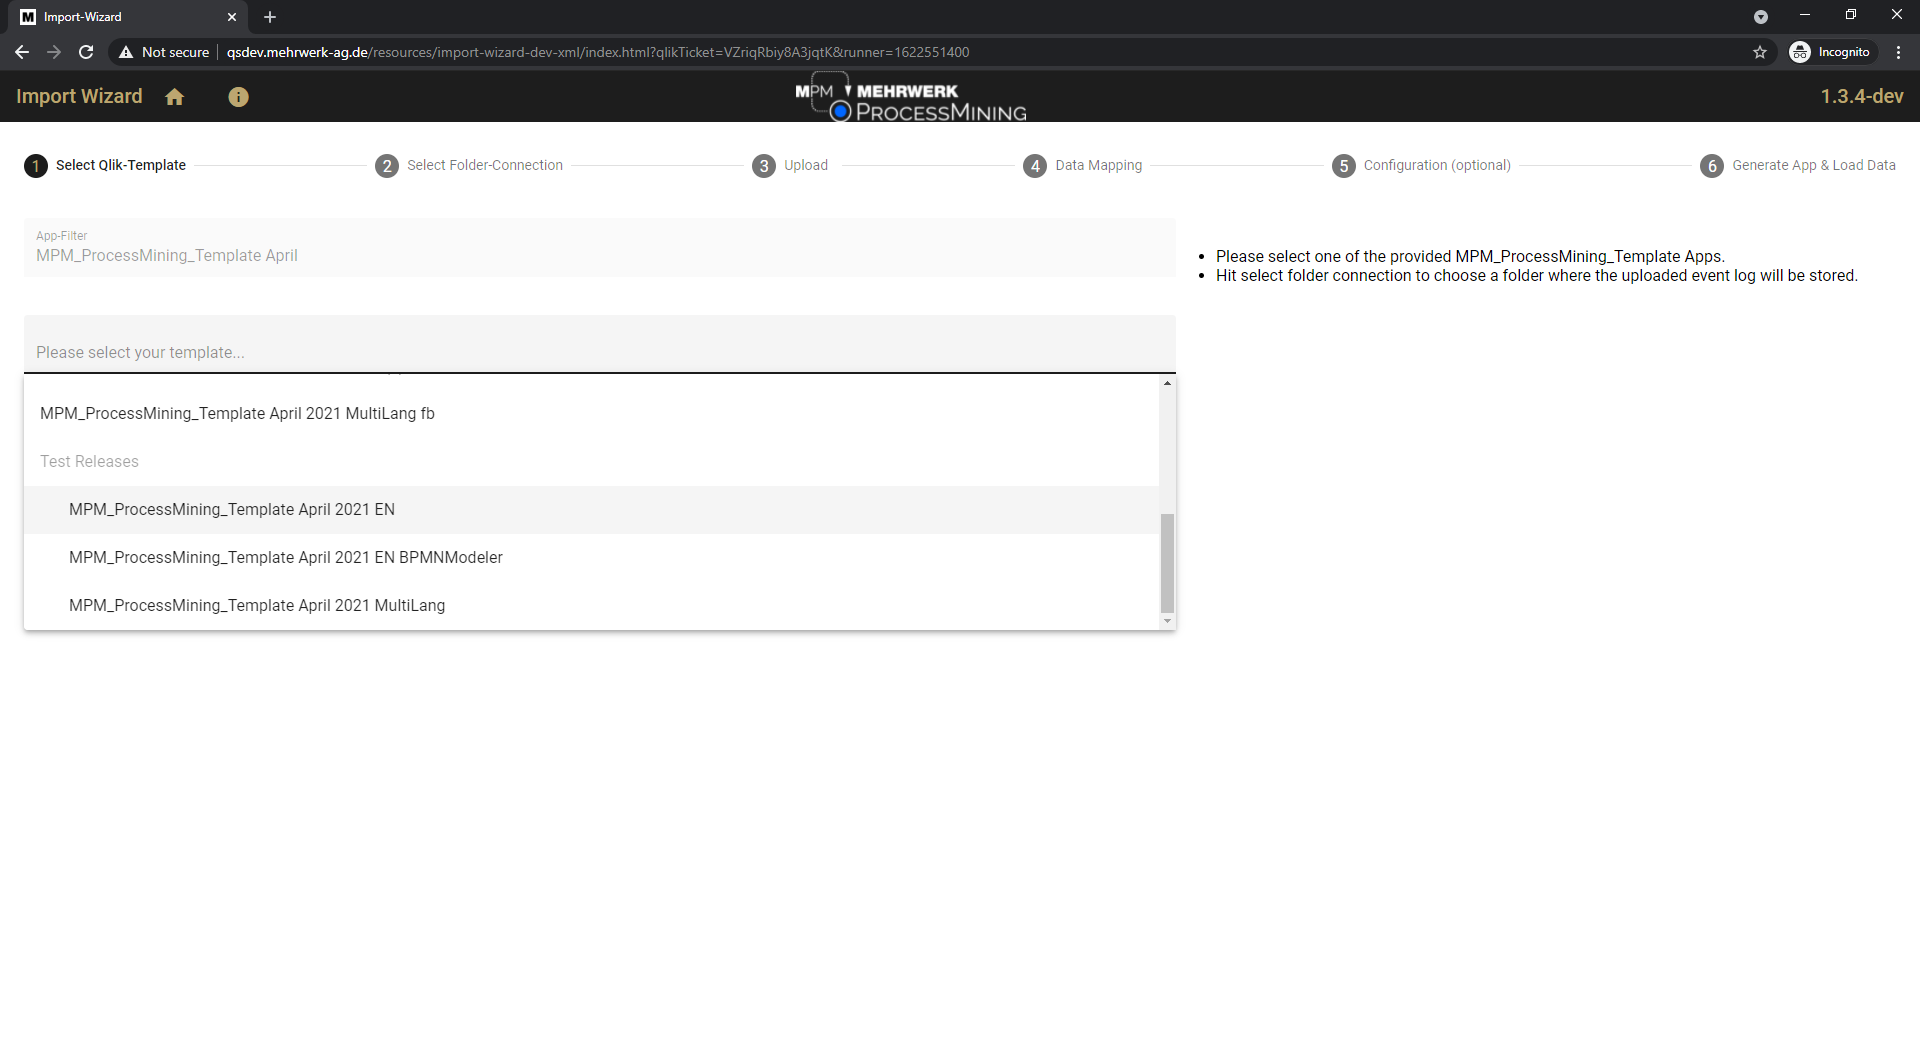
1.Select the Template App.
|
Please make sure that the selected app starts with the string MPM_ProcessMining_Template. |
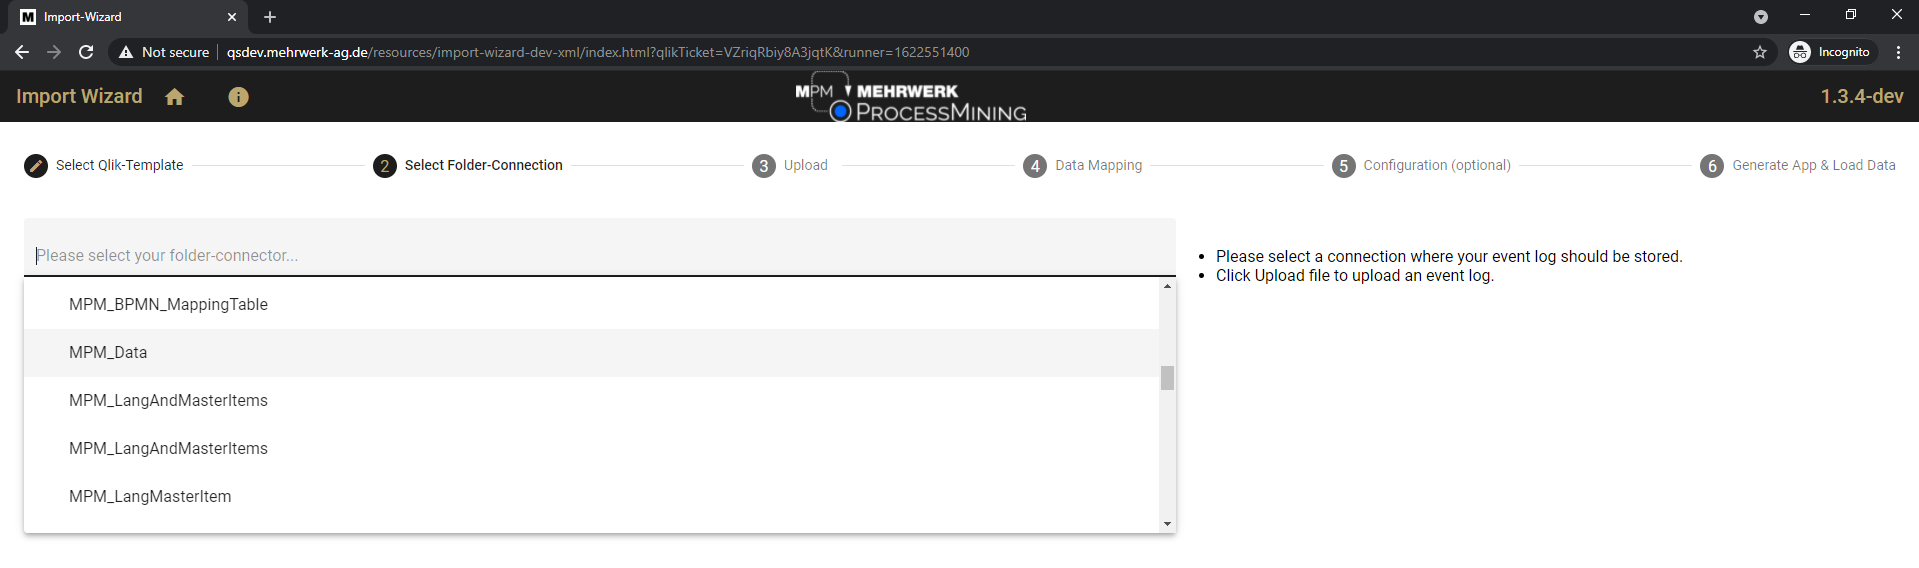
2. Select the connection where the event log should be stored.
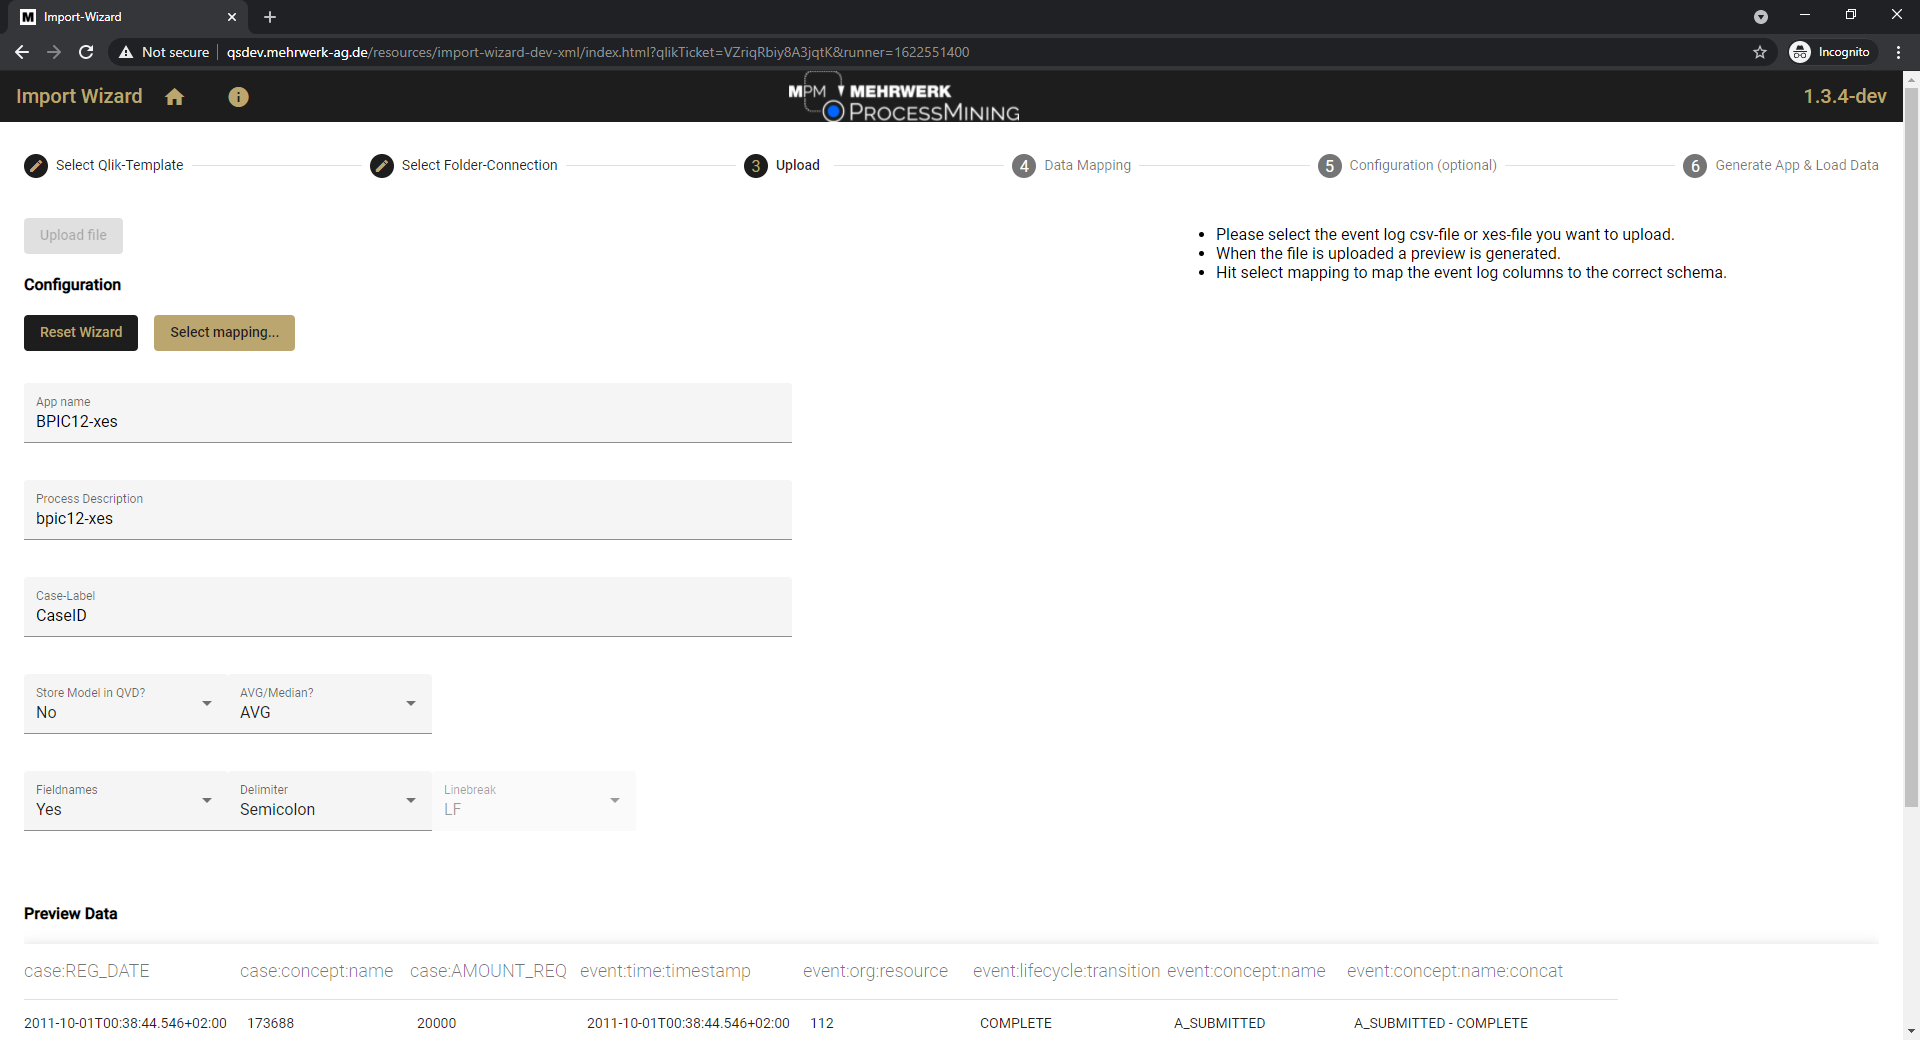
3.Select the csv or xes file that you want to upload. Here you can configure the general template app such as the delimiter, the app name and the Case-Label. Scrolling down, a preview is shown. Click on Select mapping... to map the csv or xes-fields to the eventlog-fields required for process mining. The MEHRWERK GmbH got the XES certification by the IEEE Task Force in early 2021 for the product MEHRWERK ProcessMining (MPM).
4.Map required fields by selecting the corresponding label to the desired column. One column needs to be set as ActivityType, one as CaseID, one as StartTimestamp and one as EndTimestamp or, if you only have one Timestamp, map it as ActivityStartAndEndTimestamp. If you have case context data in your event log, assign the columns to the fields CaseDimension 1-5. If you have a case geo-information in your event log, assign it to the field geofield. A Activity Type ID will be generated automatically by the Import Wizard, if you have an ID already or a sorting criteria, you might us it as SortingColumn.
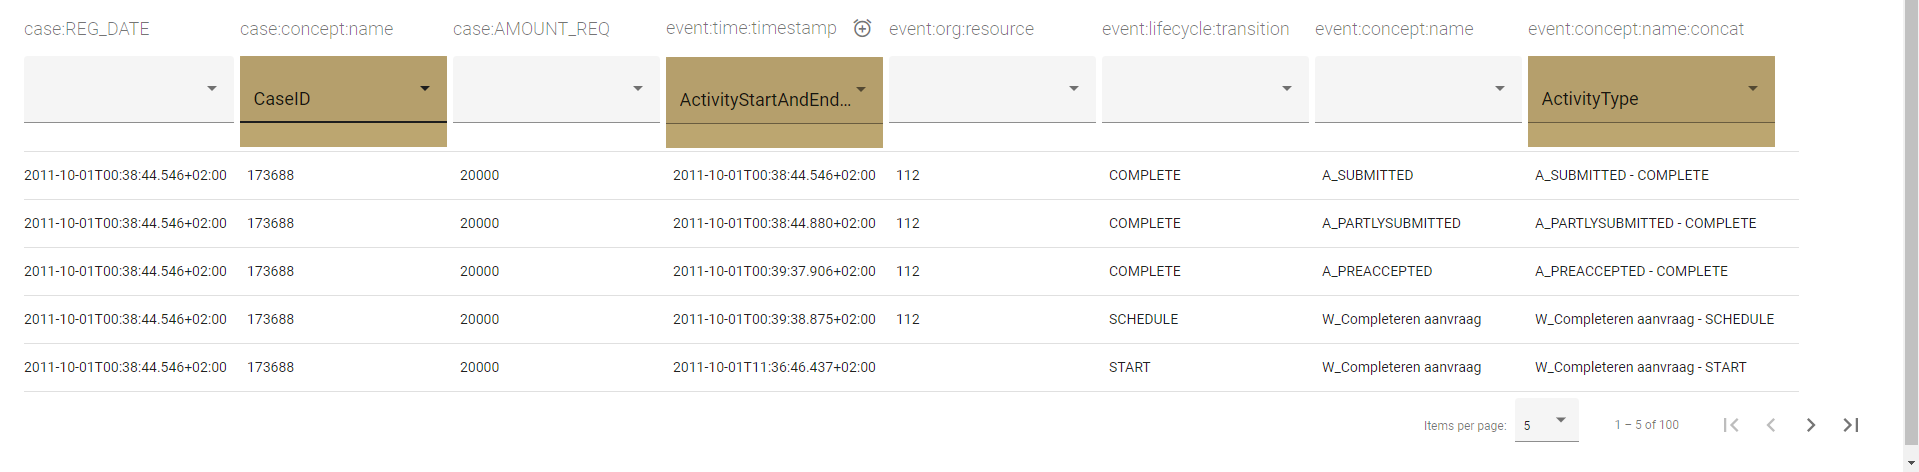
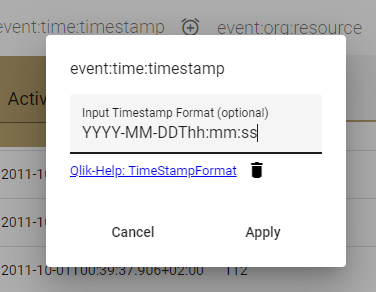
To specify the timestamp format, please click on the little clock symbol next to the mapping header and type in your format. For example, the timestamp in your data is structured like 26/11/2019 15:25:33, use 'DD/MM/YYYY hh:mm:ss'.
 |
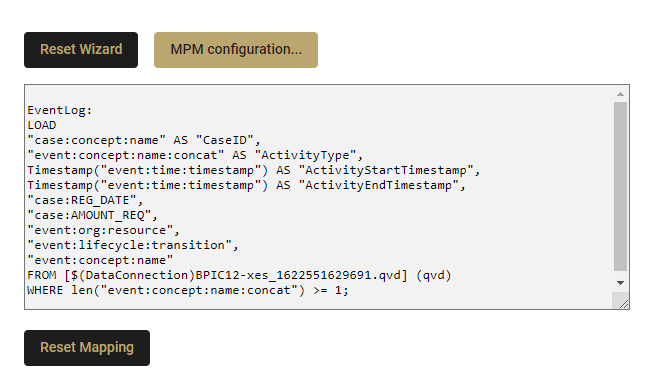
| While you map the columns you will see that the load script is generated for the event log in the upper left corner. With the button Reset Mapping you can delete the mapping to start again. The button Reset Wizard brings you back to the first step and the button MPM configuration... brings you to the next screen where you can configure custom lead times, groups, process finished filter, conformance checking or the root cause analysis. |
5.To configure the shift calender open the tab Shift Calender. Click on Add Shift and select a weekday. Add the start time and end time for the shift. You can delete the shift by clicking on the x symbol on the left side.
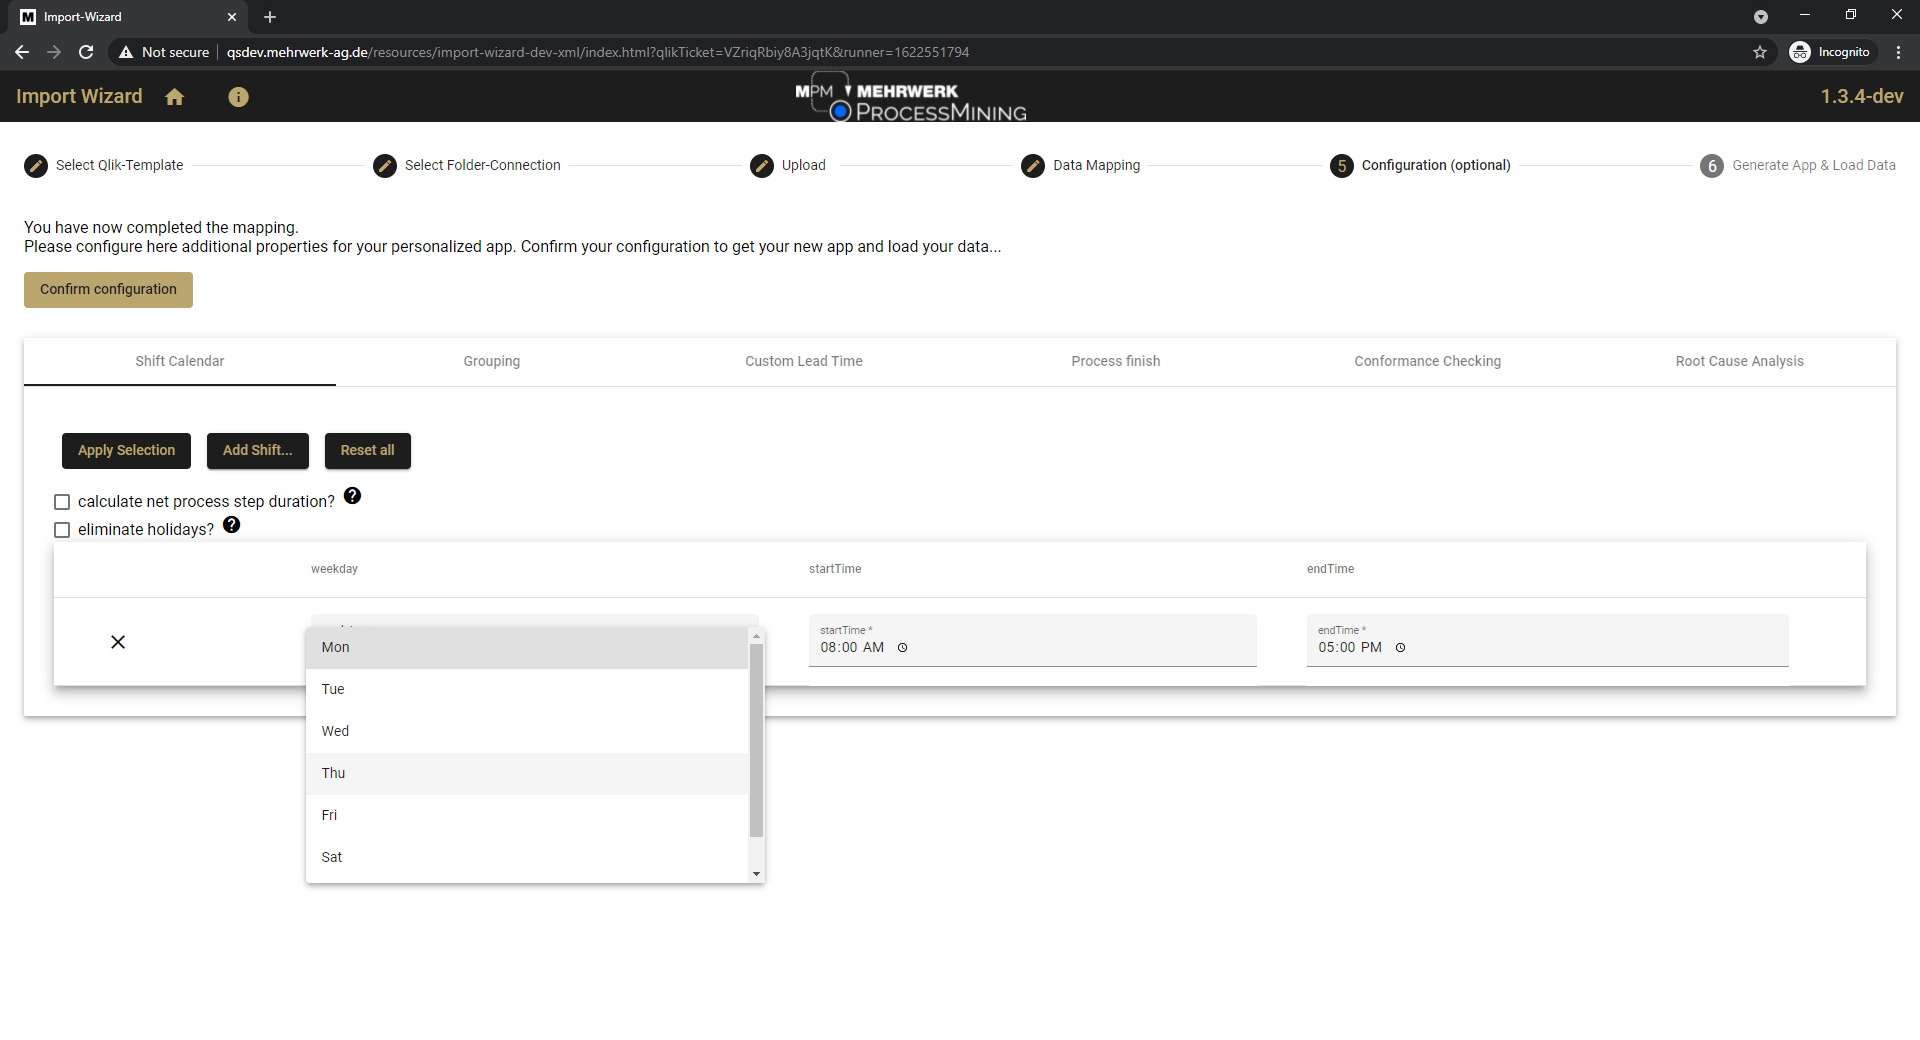 |
| For further configuration of the Shift Calender there are two options: |
a)calculate net process step duration: Choose if you like to calculate the net process step duration or not. Have in mind: if work was done outside of a shift, then the process step duration is reduced, altough work was done.
b)eliminate holidays: Choose if you like to eliminate holidays by activating this option. Deactivate if you would like to ignore holidays. When activated, holidays will not be counted as workdays.
When the shifts are completely defined click on Apply Selection to confirm.
 |
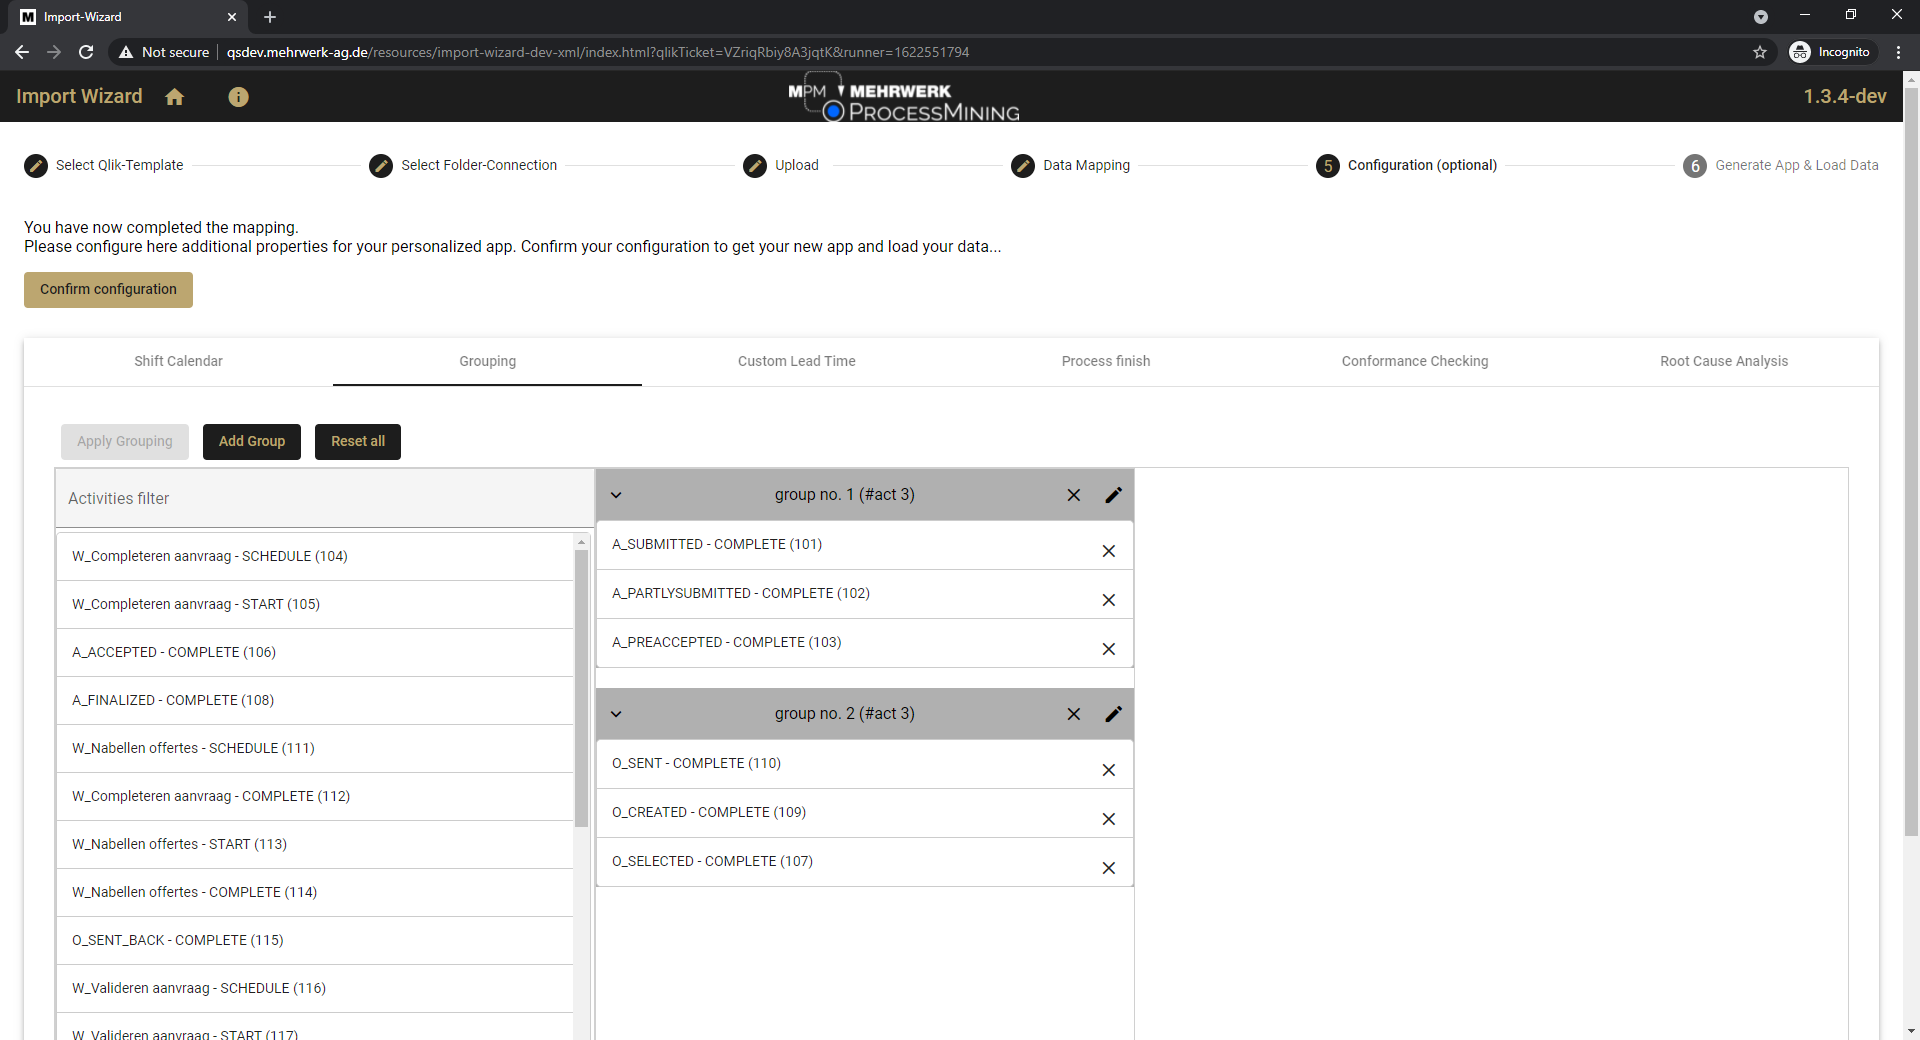
6.To enable Grouping with the wizard select the tab Grouping on the Configuration step.
| Click Add Group and a new group appears in the empty space on the right of the activity list. Give your group a name by clicking on the pencil-symbol. Then drag and drop the activities below the group. You can add several groups, switch activities from one group to another. Once your groups are defined click on Apply Grouping. You can also delete a group by clicking on the minus symbol on its left. |
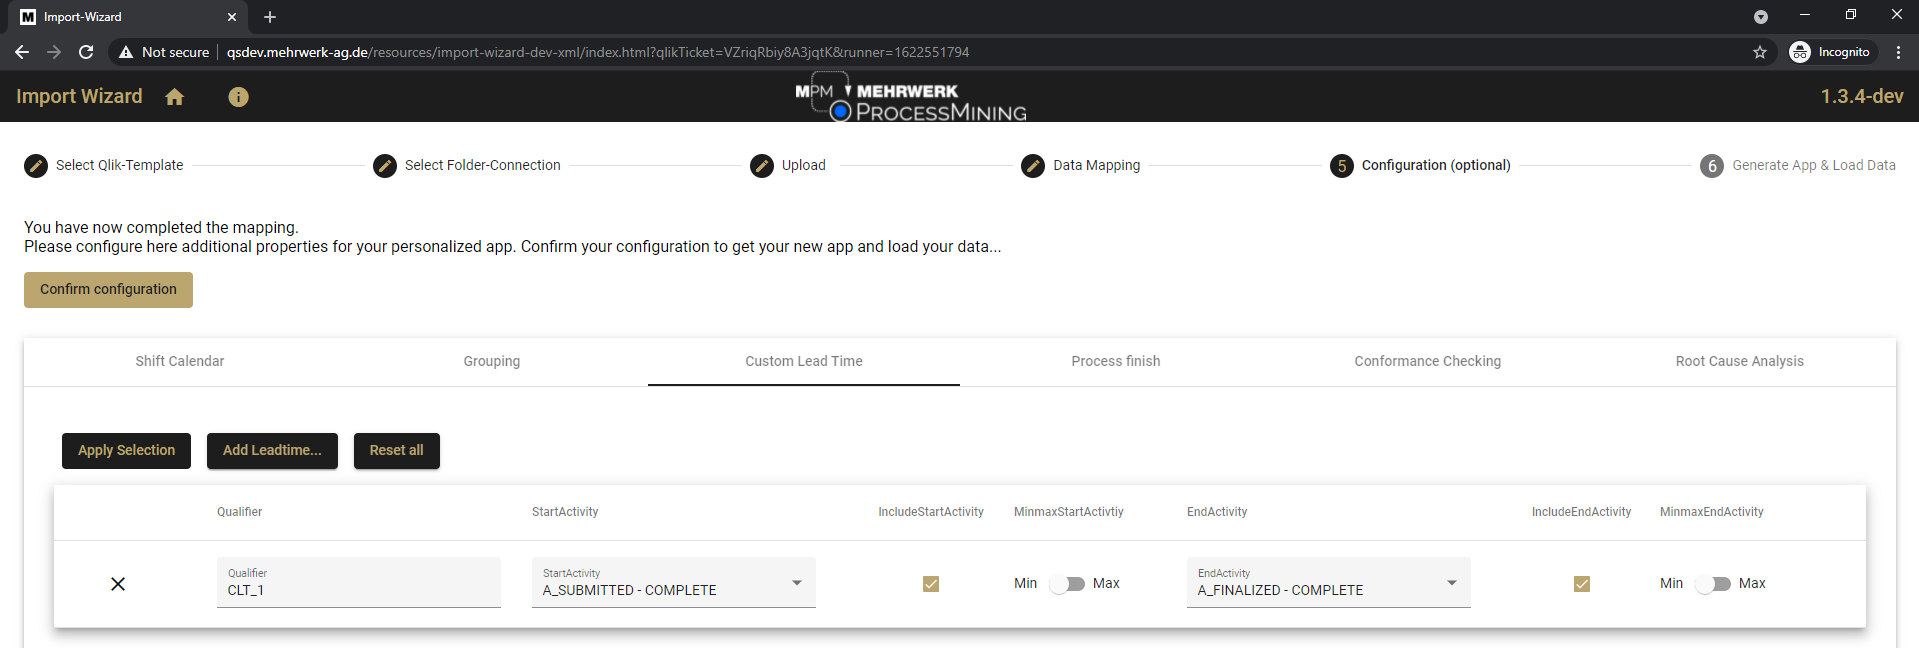
7.To configure Custom Lead Times open the tab Custom Lead Time. Click on Add Leadtime... and give your CLT a name in the field Qualifier. Select a start and end activity. It is the same configuration as in Define Custom Lead Times. You can delete CLTs by clicking on the minus symbol on the right side. When the CLTs are completely defined click on Apply Selection to confirm.
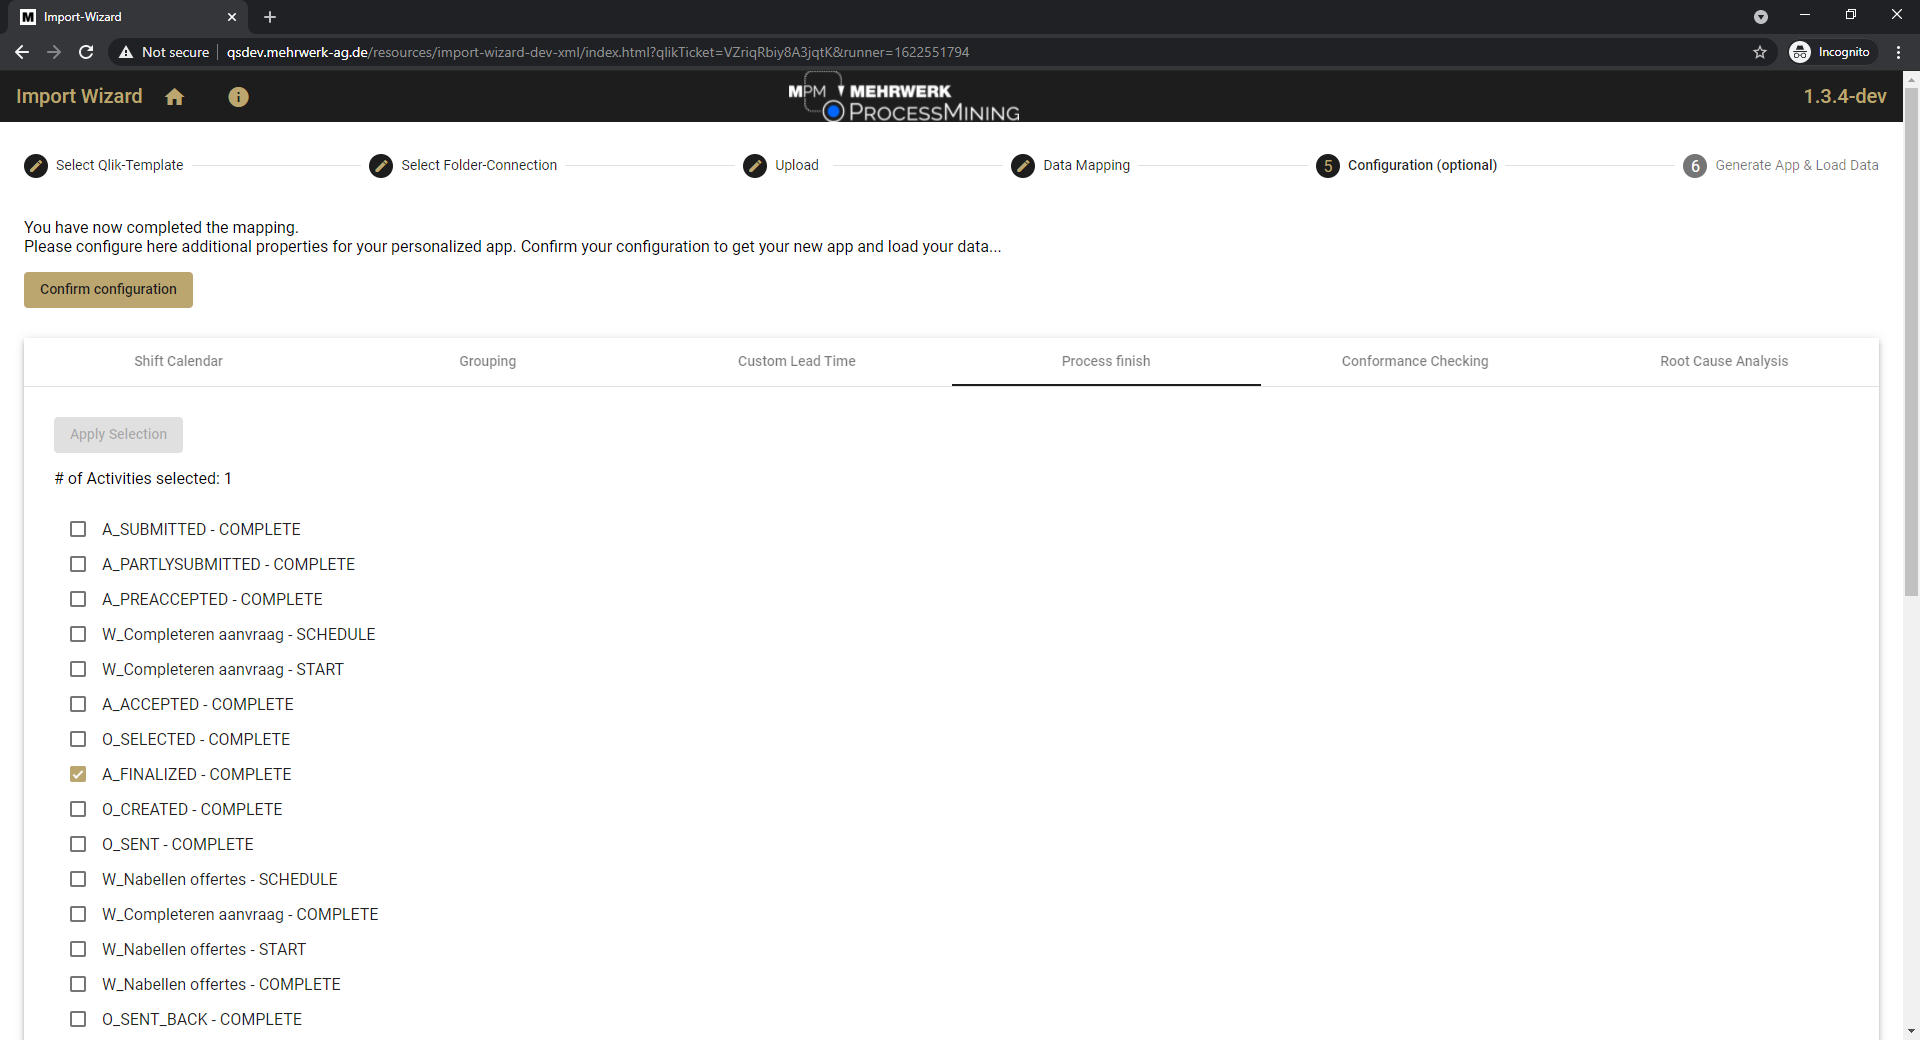
8.To configure when the process is finished go to the tab Process finish. Tick the activities which define a process end. Multiple activities can be selected. Click on Apply Selection to save your configuration.
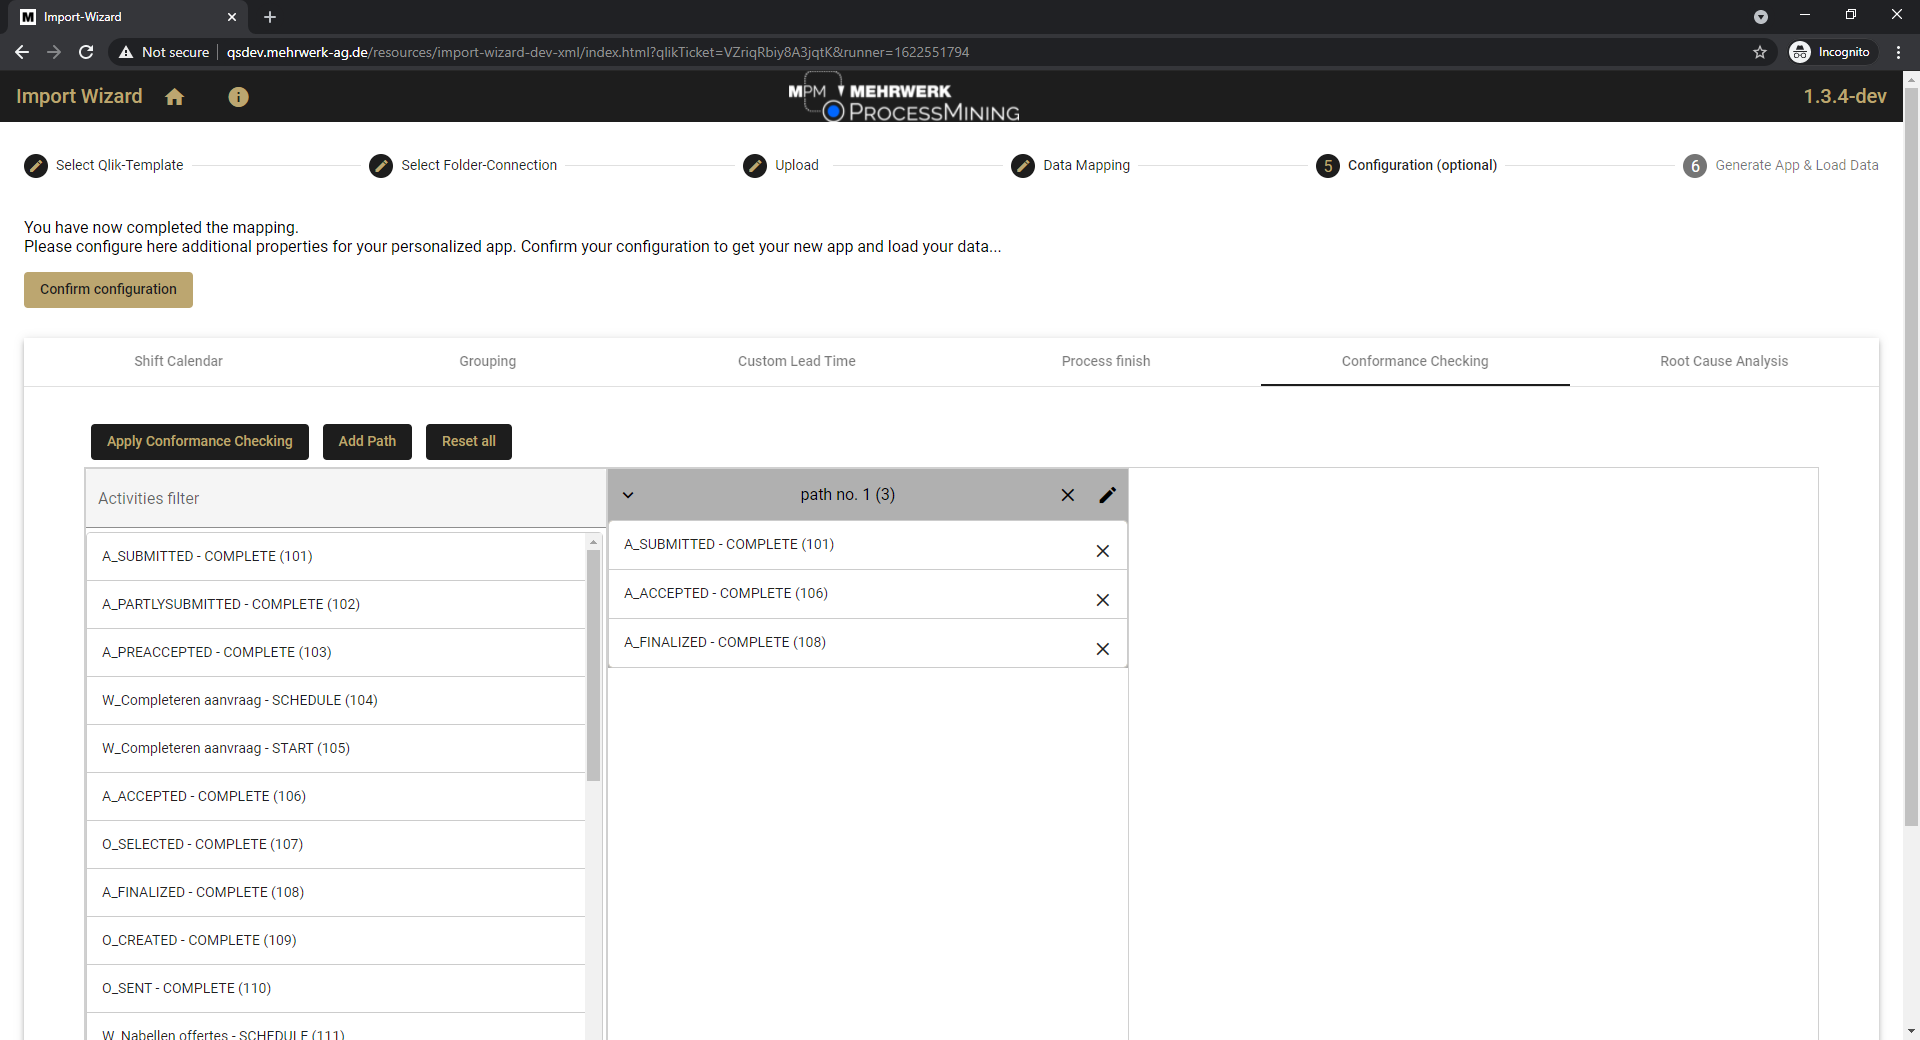
9.For Conformance Checking go to the tab Conformance Checking and click on Add Path. Name your happy path by clicking on the pen symbol. Then drag and drop the activities to the path to define your happy path. Several happy paths can be defined. Delete a happy path by clicking on the x. Click on Apply Conformance Checking to save your configuration.
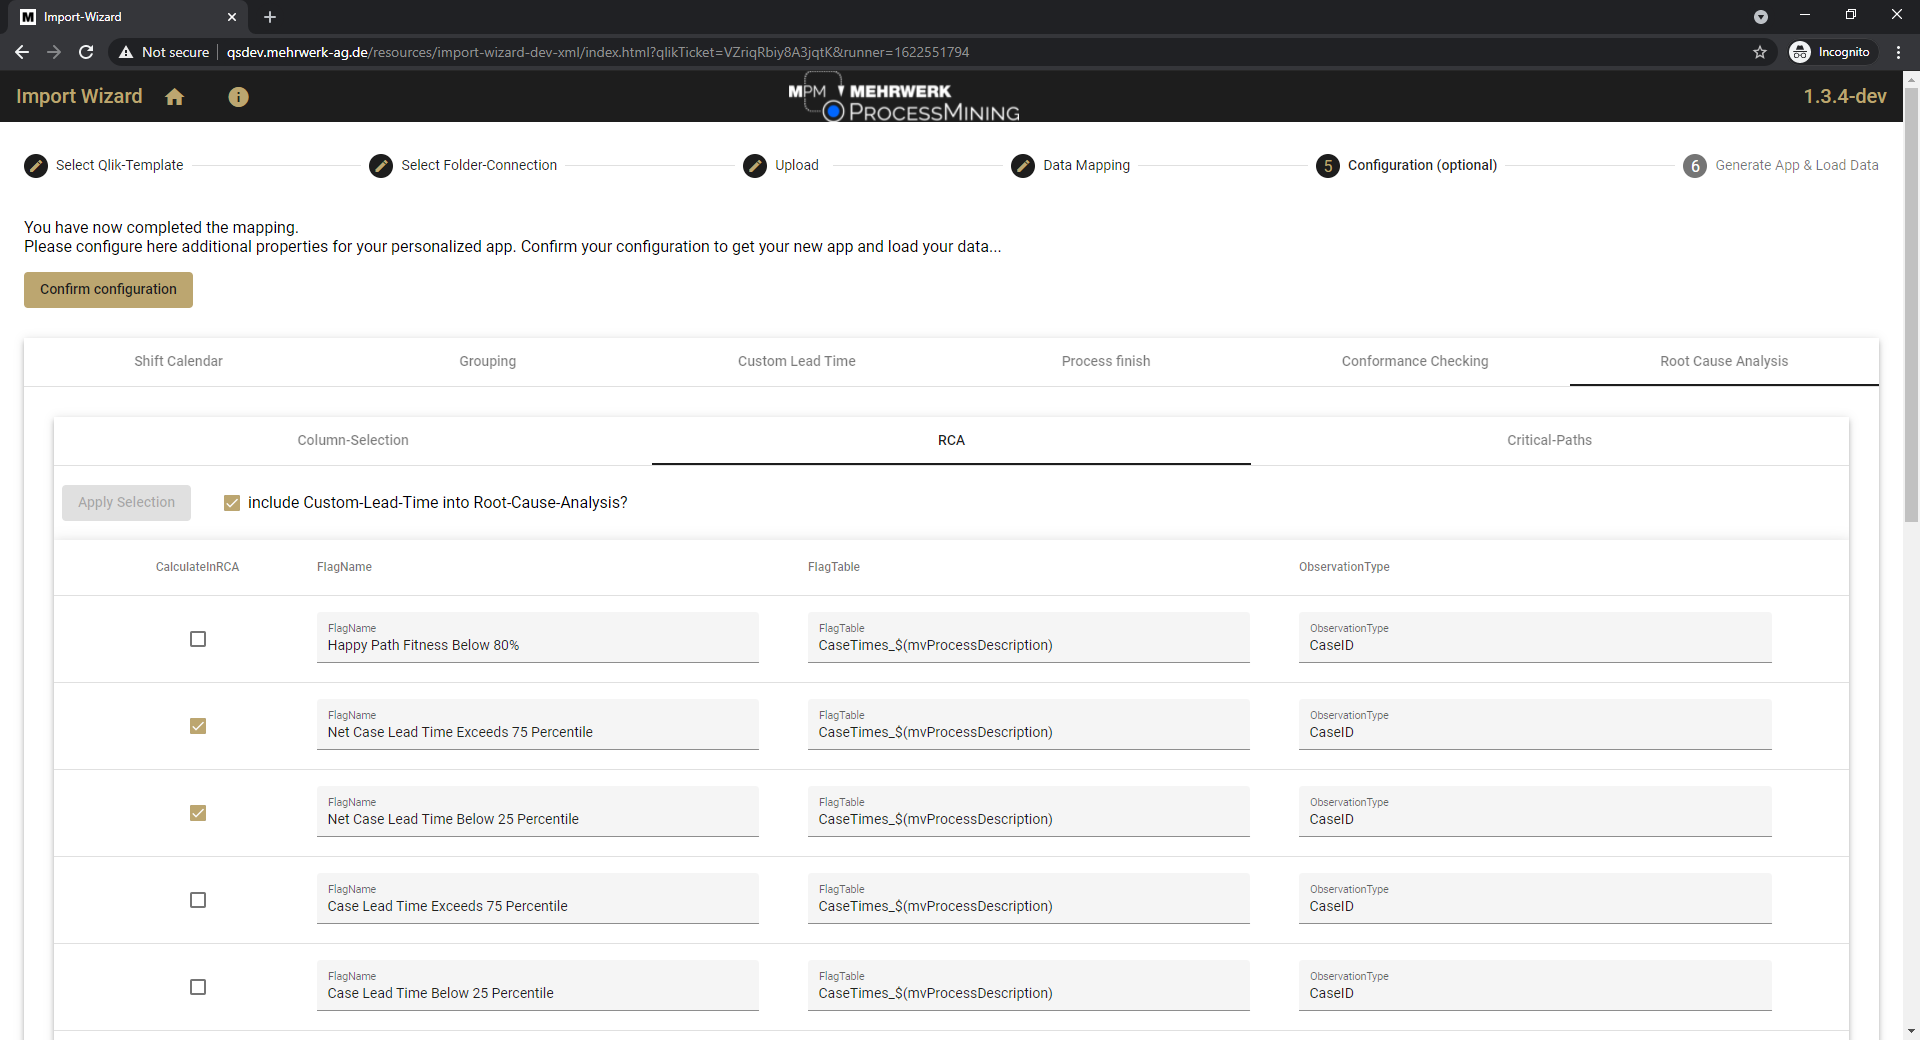
10.For Root Cause Analysis go to the tab Root Cause Analysis and select which Anomalies (FlagName) you would like to have analyzed by the RCA. Furthermore, decide if you would like to include anomalies based on custom lead times as well. Click on Apply Selection to save your configuration.
11.Finally, click on Confirm configuration to get the new app and load the data.

12.A log for the app load will be written so you can see if your script runs successfully. A link to your app, which is published in your qlik hub is posted when the script finished running. When you click on the link the app will open and is ready to use.
