|
Data Storytelling |
Scroll Previous Topic Top Next Topic More |
Data storytelling is a way to share your data insights as part of a broader discussion or main topic.
The purpose of data storytelling is to frame data exploration as a story. By emphasising important elements, compelling stories can be written to help stakeholders make decisions.
Data storytelling allows you to combine and share reporting, presentation and investigation techniques. You create snapshots of your data to use in stories composed of slides. Snapshots can be made more appealing with effects. This allows you to emphasise the data insights you want your audience to focus on.
As you present the story, you can answer questions by switching to the source of a snapshot and accessing live data. This gives your story new perspectives and triggers new conversations and deeper insights.
Storytelling becomes interactive by inserting live data worksheets into slides and making selections during the presentation.
For a visual demo of storytelling, see "Sharing insights with data storytelling".
Below you will find information on the following topics:
•Collecting insights for a story with the help of snapshots
Collecting insights for a story with the help of snapshots
To get a complete picture of your app, you need to be able to capture the insights you have gained. To do this, create and use static snapshots of your visualisations.
A snapshot is a graphical representation of the status (type and data) of a data object at a specific point in time and can be used to create stories. The snapshot you create is a copy of this status. This means that the status of a snapshot does not change when the status of the underlying data object is updated.
When you create a snapshot, you can add a note for your snapshot. The note is displayed in the snapshot library and helps you to differentiate between snapshots when you are building your story. The note is not displayed when you play back the story.
After you have taken snapshots of a specific visualisation, you can open the snapshot library via the shortcut menu of the visualisation. You can now decide which snapshots you want to keep and use in your stories. You can edit the note and delete the snapshots.
When the snapshot library is opened from the storytelling view, all snapshots of all visualisations are displayed in the app.
If the visualisation you want to take a snapshot of is an extension, you must ensure that the snapshot function is activated in the main script. To do this, set the snapshot property to "true".
For more information, see Allow Snapshots of your visualization.
Creating snapshots
In the worksheet view, you can take snapshots of visualisations and use them to create a story in Data Storytelling.
You can create snapshots of all the different visualisation types, but not of filter boxes.
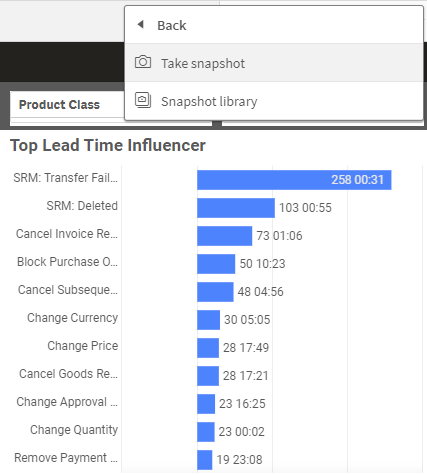
Create Snapshot
Proceed as follows:
1.Go to the visualisation in the worksheet view.
2.Right-click on the visualisation or click on the menu icon.
3.Click on Create snapshot.
4.The snapshot is taken and saved in the snapshot library. It is given the same title as the visualisation.
Display snapshots
When you are working on a story, you can select all your snapshots from the Snapshot library.

Snapshot Library
Proceed as follows:
1.Click on the camera icon in the Storytelling view in the Story window, Extras menu.
| The snapshot library opens and the snapshots are displayed sorted by date. The most recent snapshots are at the top. |
2.Click on the camera icon and close the snapshot library.
Editing notes
When you take a snapshot, you can add a note. You can change the note in the snapshot library or add comments to snapshots without notes.
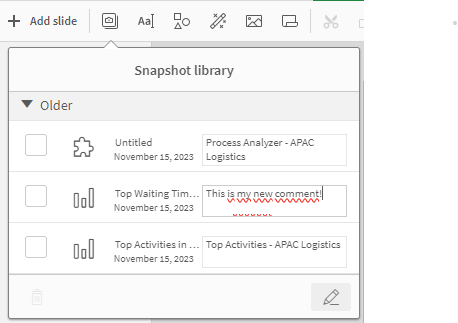
Snapshot New Comment
Proceed as follows:
1.Click on the camera icon in the Storytelling view in the Story window, Extras menu.
| The snapshot library opens with a list of all your snapshots. |
|
Note: In the worksheet view, right-click on the visualization for which you want to display snapshots. Then click on the menu icon and select Snapshot library from the shortcut menu. |

2.Click on the edit icon.
3.Click on the comment text area to the right of the snapshot name.
|
Note: You cannot edit the comments of snapshots that belong to a published version of the app. |
4.Edit the notes.
5.Click on the edit icon or outside the text area.
| The comment is saved. |
6.Click outside the library to close it.
Deleting Snapshots
You can delete a snapshot from the snapshot library, which contains all the snapshots you have taken in the app. You cannot delete snapshots that belong to a published version of an app.
Proceed as follows:
1.In the Storytelling view in the Story window, Extras menu, click on the camera icon.
| The snapshot library opens with a list of all your snapshots. |
|
Note: In the worksheet view, right-click on the visualization for which you want to display snapshots. Then click on the menu icon and select Snapshot library from the shortcut menu. |
2.Click on the edit icon.
| Editing is activated. |
3.Select the snapshots you want to delete.
|
Note: You cannot delete snapshots that belong to a published version of an app. |
4.Click on the trash can icon.
| The selected snapshots are deleted. |
5.Click on the edit icon to finish editing.
6.Click outside the library to close it.