|
Installation Instruction Videos |
Scroll Previous Topic Top Next Topic More |
Below are several short videos to help walk you through the installation process, based on version 2.3.0 (January 2024).
1.Introduction & Major Changes (5:36)
2.Folder Structure (4:17)
3.Deployment
a.On Premise Deployment (20:11)
i.Visual Studio Setup
ii.Setup Data Connections and Start Modeling
iii.Event Log and Case Information Modeling
iv.Variables Customization and Config Repository until Loading Data
b.Qlik Cloud Deployment with Sharepoint
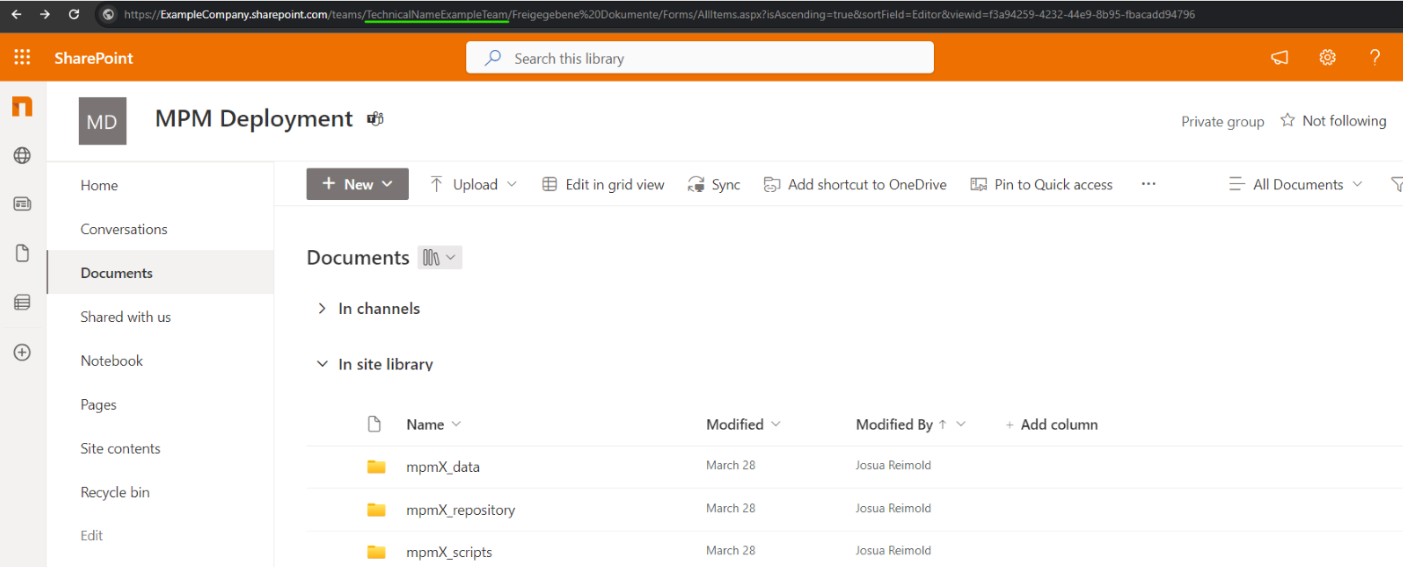
i.Set up a Teams that contains the mpmX_data, mpmX_repository and mpmX_scripts folders with their corresponding content

Cloud Deployment - folder setup
ii.Copy the team's name from the URL (this name can differ from the displayed team's name below)
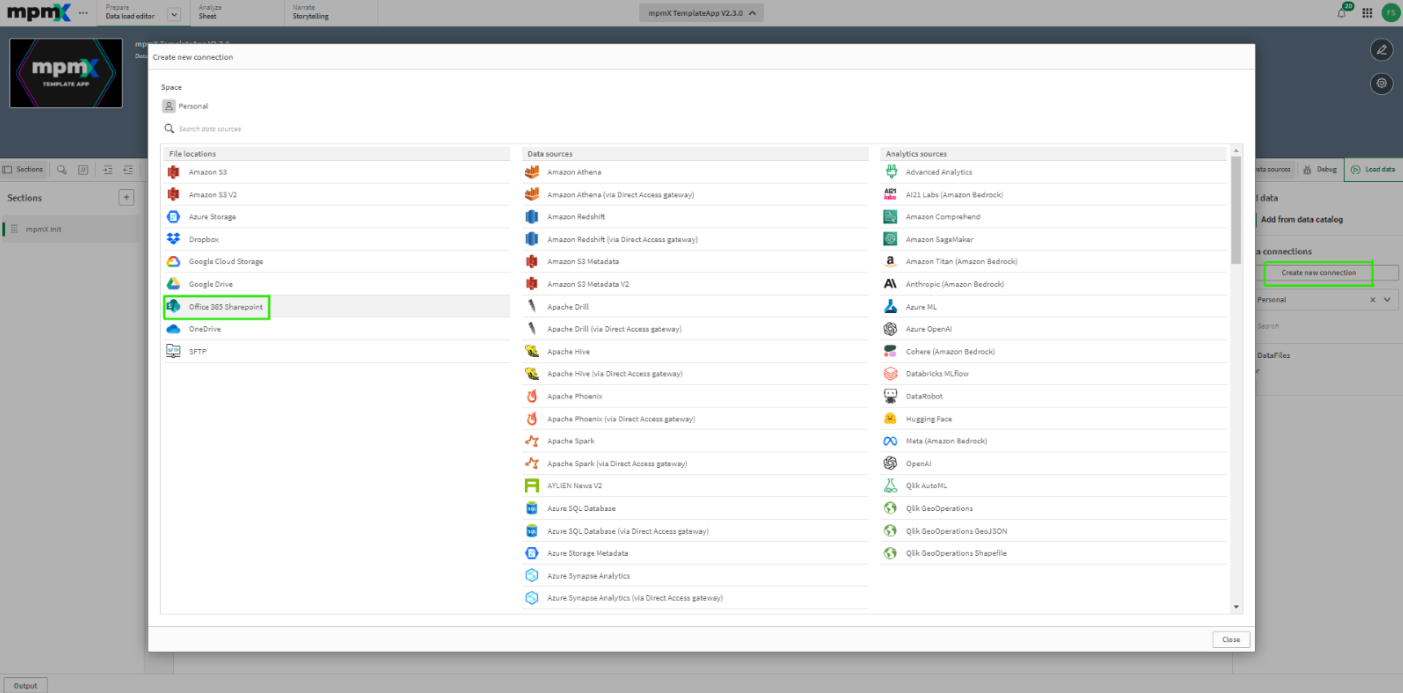
iii.In the data load editor, click “Create new connection” and then “SharePoint”

Cloud Deployment - new SharePoint connection
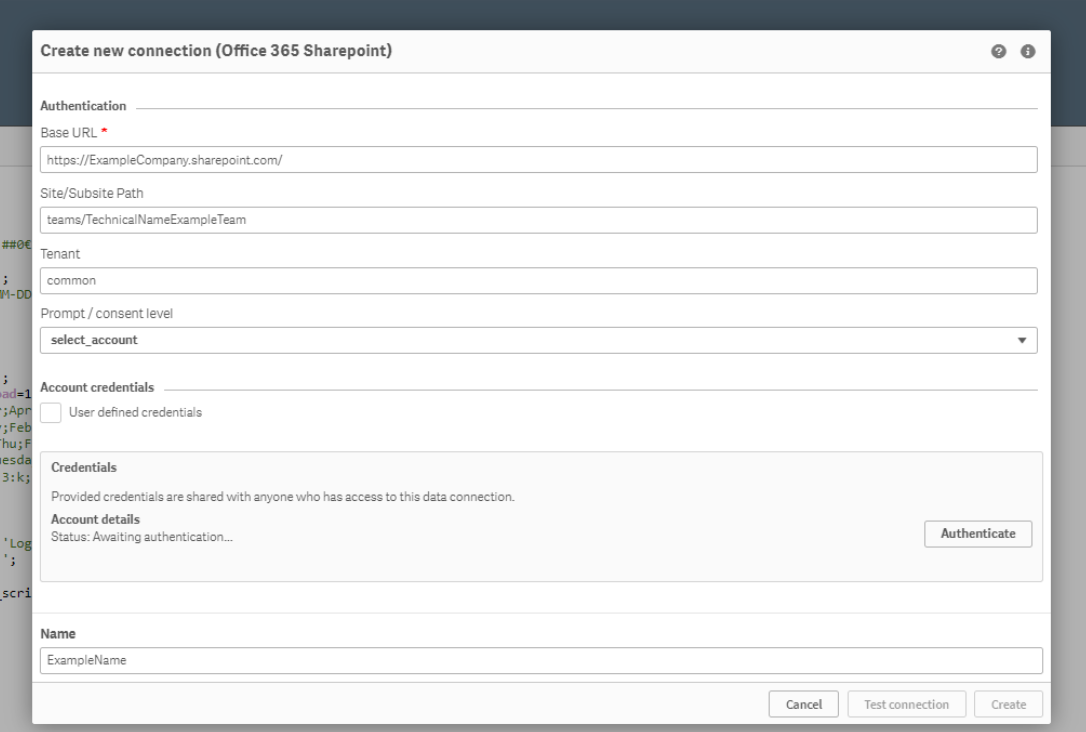
iv.Input the Base URL and Site/Subsite Path

Cloud Deployment - Base URL and Site/Subsite Path
v.Click Authenticate and follow the steps
Your SharePoint connection is set up and you can configure your files there
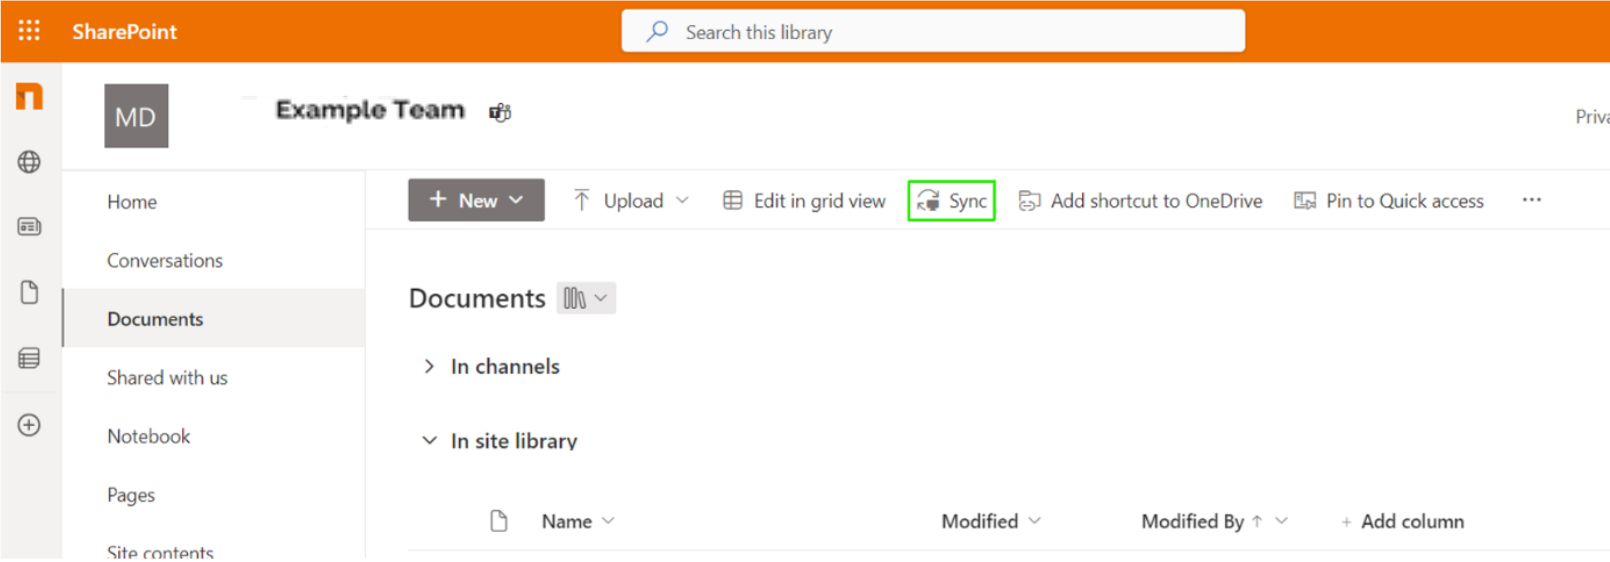
vi.A hint for the configuration is to synchronize the teams so you can edit the files locally on your computer

Cloud Deployment - sync SharePoint
vii.From here on, you can configure your files as explained in the videos.
4.Front End Editing & Master Items e.g. Time Format or Case Label (13:49)
5.Subset Loads (8:40)
6.Front End Layout, App Overview, RCA & User Sheets (7:03)
1.Introduction & Major Changes (5:36)
Introduction & Major Changes
Folder Structure
Deployment
4.Front End Editing & Master Items e.g. Time Format or Case Label (13:49)
Front End Editing & Master Items e.g. Time Format or Case Label
Subset Loads
6.Front End Layout, App Overview, RCA & User Sheets (7:03)
Front End Layout, App Overview, RCA & User Sheets